
Authentication & Authorisation
Note: In the documentation we simply recommend creating a single deployment user, and sharing it between team members. If you know why this is a bad idea (or why this may be against regulations in your jurisdiction in some cases), we assume that you know well enough how to use groups, umasking and setgid bits to make this work reliably for unique logins across team members.
To create this deploy user we’ll assume something like the following has been done:
root@remote $ adduser deploy
root@remote $ passwd -l deploy
The first line creates a completely standard user, it has a home directory, which we’ll need in a moment, and has a shell, so it may log in. This needs to be done on every server in your environment.
The second line locks the user, it changes the user’s password to an untypable string, guaranteeing that the user has no password which can be used to log in.
Authentication
There are two places that we need automated, promptless authentication:
- From our workstation/notebook/etc to our servers. We do this with SSH keys, passphrase protected, ideally, using a key agent.
- From our servers to the repository host. We do this so that our servers can check out our application code from Github, or similar and install it to the servers. This is usually done using SSH agent forwarding, HTTP authentication, or with deploy keys.
1.1 SSH keys from workstation to servers
An SSH key is a mechanism that allows a public half one key to be placed on a server, when we want to authenticate with that server, our SSH client uses the private part of that key to negotiate with the server, if the keys are correct, we are allowed to login.
Note: If you are on Windows, you can use Git for Windows to generate ssh keys. To do this, follow this steps:
- Install Git for Windows.
- Open “Git Bash” and follow next instructions always inside Git Bash prompt.
- Activate ssh-agent:
$ eval "$(ssh-agent -s)"
Note: If you want to use Putty tool to connect to remote server (from Windows) with ssh keys, then you need to generate ppk file, through puttygen tool.
Hint: If you have more than one developer in your team, they should all add their
public key to the deploy user’s authorized_keys file, that way if someone
quits or gets fired, you can remove their key from that file, and the rest of
you can keep on shipping!
Then we need to create the key.
me@localhost $ ssh-keygen -t rsa -C 'me@my_email_address.com'
You’ll be prompted for a passphrase, that’s fine. Type one and keep it safe. This passphrase ensures that if your computer is stolen, people still need a passphrase to access your keys, in order to access your servers.
To avoid having to type this passphrase every time you need to use a key, most operating systems have a concept of a key agent. This key agent stores SSH keys securely between uses, typically the first time a key is needed in a given time period, the SSH agent will load the key, prompt you for your passphrase and then the key agent will remember the key for a certain amount of time (on OSX it tends to be indefinite, on linux this can vary from 15 minutes upwards.)
We can see which keys are loaded in the SSH agent by running ssh-add -l
me@localhost $ ssh-add -l
2048 af:ce:7e:c5:93:18:39:ff:54:20:7a:2d:ec:05:7c:a5 /Users/me/.ssh/id_rsa (RSA)
If you don’t see any keys listed, you can simply run ssh-add:
me@localhost $ ssh-add
Identity added: /Users/me/.ssh/id_rsa (/Users/me/.ssh/id_rsa)
Typically, ssh-add will ask you for the passphrase when you add a key.
Note: Although it’s not mandatory to use an SSH agent (one could simply use an unpassphrased key, and rely on SSH to find the key and exchange it). Using an SSH agent makes things more secure, because we can use a passphrased key without being prompts every time it is used. It also allows us to use this same key to access the repository via the server without creating an additional identity.
At this point with the key loaded into the agent, we need to put the
public part of the key into a file on each remote server called
/home/users/deploy/.ssh/authorized_keys, to get the contents of that file,
we can ask our local key agent for the public parts of the keys it has loaded:
me@localhost $ ssh-add -L
ssh-rsa jccXJ/JRfGxnkh/8iL........dbfCH/9cDiKa0Dw8XGAo01mU/w== /Users/me/.ssh/id_rsa
This will be a lot longer when you run it, I snipped the output because it looked bad.
This line, as one line, needs to make it to the remote server and be added to
it’s own line of the deploy user’s ~/.ssh/authorized_keys file. This file
then needs to be changed to permission mode 0600 (owner read/write, group
none, other none), in the ~/.ssh directory which needs the permissions
0700 (owner read/write/execute, group none, other none).
If you are on linux there often exists a command
ssh-copy-id which streamlines this
process, otherwise the workflow is something like:
me@localhost $ ssh root@remote
root@remote $ su - deploy
deploy@remote $ cd ~
deploy@remote $ mkdir .ssh
deploy@remote $ echo "ssh-rsa jccXJ/JRfGxnkh/8iL........dbfCH/9cDiKa0Dw8XGAo01mU/w== /Users/me/.ssh/id_rsa" >> .ssh/authorized_keys
deploy@remote $ chmod 700 .ssh
deploy@remote $ chmod 600 .ssh/authorized_keys
Remember: This needs to be done on every server you want to use, you can use the same key for each one, but only one key per developer is recommended. Private keys are named as such for a reason!
If we did all that correctly, we should now be able to do something like this:
me@localhost $ ssh deploy@one-of-my-servers.com 'hostname; uptime'
one-of-my-servers.com
19:23:32 up 62 days, 44 min, 1 user, load average: 0.00, 0.01, 0.05
That should happen without having to enter a passphrase for your SSH key, or prompting you for an SSH password (which the deploy user doesn’t have anyway).
Verify that this works for all of your servers, and put your private key somewhere safe. If you’re working with multiple team members, it often pays to collect everyone’s public keys, indeed if your team is already using SSH keys to access Github, you can reach any user’s SSH keys at the following URL:
https://github.com/theirusername.keys
This can make getting user’s keys onto servers much easier, as you can simply
curl/wget each user’s key into the authorized keys file on the server
directly from Github.
TIL @github exposes the ssh public keys for users. https://t.co/Wo9g8nxI Handy for adding devs to servers/repos.
— Postmodern (@postmodern_mod3) February 10, 2013
If your server isn’t accessible directly and you need to use the SSH ProxyCommand option, you should do
require 'net/ssh/proxy/command'

set :ssh_options, proxy: Net::SSH::Proxy::Command.new('ssh mygateway.com -W %h:%p')

# OR

server 'internal-hostname',
  ssh_options: {
    proxy: Net::SSH::Proxy::Command.new('ssh mygateway.com -W %h:%p'),
  }
1.2 From our servers to the repository host
With access from workstations to the servers settled, there is another hop to contend with, which is letting the deploy user get access to the code repository automatically. The options in order of preference:
1.2.1 SSH Agent Forwarding
As we’ve already set up an SSH agent, we can use the agent forwarding feature of SSH to make this key agent available to further hops. In short, we can use our own ssh key to authenticate ourselves from the server to Github.
Here’s how we can check if that works, first get the URL of the repository:
me@localhost $ git config remote.origin.url
git@github.com:capistrano/rails3-bootstrap-devise-cancan.git
Here we’re listing our private (for testing purposes) fork of the rails3-bootstrap-devise-cancan repository forked from the Rails Examples and Tutorials project.
We can try to access the repository via our server by doing the following:
# List SSH keys that are loaded into the agent
me@localhost $ ssh-add -l
# Make sure they key is loaded if 'ssh-add -l' didn't show anything
me@localhost $ ssh-add
me@localhost $ ssh -A deploy@one-of-my-servers.com 'git ls-remote git@github.com:capistrano/rails3-bootstrap-devise-cancan.git'
We first check that the agent has the keys loaded. If not we simply load it and enter the passphrase when prompted.
Finally we use ls-remote from Git to list the remote objects, this is the
exact same check that Capistrano does internally before attempting to deploy.
The -A option may, or may not be required on your system, it’s worth trying
it both ways just to know how your system treats agent forwarding by default.
If you get the error “host key verification failed.” log in into your server
and run as the deploy user the command ssh git@github.com to add github.com
to the list of known hosts.
From the SSH documentation:
-A  Enables forwarding of the authentication agent connection.  This can also be
   specified on a per-host basis in a configuration file.

   Agent forwarding should be enabled with caution.  Users with the ability to
   bypass file permissions on the remote host (for the agent's UNIX-domain
   socket) can access the local agent through the forwarded connection.  An
   attacker cannot obtain key material from the agent, however they can perform
   operations on the keys that enable them to authenticate using the identities
   loaded into the agent.
In layman’s terms, you shouldn’t use SSH agent forwarding to machines where you don’t trust the administrators, as they can can override the permissions on the system and use your keys as if they were you. That said, if you can’t trust your server administrators, perhaps they shouldn’t have access to your servers!
1.2.2 HTTP Authentication
In the case of HTTP authentication be sure to use HTTPS, otherwise your password will be sent in cleartext over the network, depending what your hosts network infrastructure looks like that might be very bad news.
Typically when we try and list our remote objects, using the https method from Github, we’ll be prompted for a username and password:
1.2.2.1 With a regular username/password
me@localhost $ git ls-remote https://github.com/capistrano/rails3-bootstrap-devise-cancan.git
Username for 'https://github.com': myownusername
Password for 'https://capistrano@github.com':
This challenge response prompt doesn’t work well for automating things, so
there are two ways to get around this depending on your server’s host
operating system, the first is to use a netrc file, we won’t talk about that
because the netrc is a global file that doesn’t lend itself well to security.
The other mechanism, and the reason that its very important to always use HTTPS not plain ol’ HTTP is to embed the username and password in the URL, note this won’t work well if your password has special characters:
me@localhost $ git ls-remote https://capistrano:ourverysecretpassword@github.com/capistrano/rails3-bootstrap-devise-cancan.git
3419812c9f146d9a84b44bcc2c3caef94da54758HEAD
3419812c9f146d9a84b44bcc2c3caef94da54758HEADrefs/heads/master
The bigger problem with passwords, whether inlined into the URL, or entered
into a netrc file, is that the password gives access to your entire Github
Account not just to one single repository.
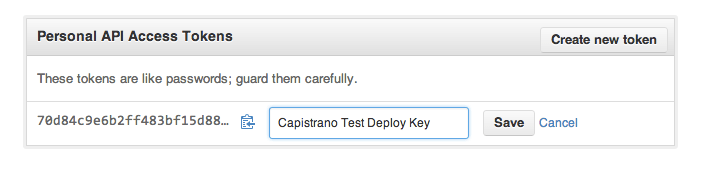
1.2.2.2 With an OAuth Personal API Token
This mechanism still gives access to every repository you can access, but at Github, they recently rolled out a feature called Personal API Tokens which allow you to do something like this:
me@localhost $ git ls-remote https://XXXX:@github.com/capistrano/rails3-bootstrap-devise-cancan.git
3419812c9f146d9a84b44bcc2c3caef94da54758HEAD
3419812c9f146d9a84b44bcc2c3caef94da54758HEADrefs/heads/master
Where XXXX is a personal API token, as such:
1.2.3 Deploy Keys
Deploy keys, a feature of Github, and some other platforms allow you to generate a second set of SSH keys for the connection between Github and the servers themselves.
Slightly perversely in this case the public key is uploaded to the repository host, and the private key must be copied to each server that you want to deploy to.
Github has a quite excellent guide on this, much of which (unsurprisingly) overlaps with the SSH key instructions above.
Authorisation
The second part of this topic is that our deploy user needs to be authorised
to work in the deployment directory, on the server. That means we need to be
able to work, ideally without sudo (none of the default Capistrano recipes
expect sudo to be available), or for your custom recipes, you will need to
have configured passwordless sudo. Configuring sudo to give some users
access to some commands under some circumstances is beyond the scope of this
documentation, but sufficed to say something like:
deploy ALL=NOPASSWD:/etc/init.d/mysqld, /etc/init.d/apache2
This example would give the user named deploy access to call sudo
/etc/init.d/mysql _________ and the same for the apache2 control script.
Granting passwordless sudo should not be done lightly. It can be dangerous. For example if an unprivileged user can edit the script that they can run as root, they can easily edit it to do anything they want that is evil. Use this carefully, and ideally architect your systems so that non-privileged users can restart services, or that services restart themselves when they notice a change.
To configure this hierarchy, ignoring for the moment the passwordless sudo
access that you may or may not need depending how well your servers are setup:
me@localhost $ ssh root@remote
# Capistrano will use /var/www/....... where ... is the value set in
# :application, you can override this by setting the ':deploy_to' variable
root@remote $ deploy_to=/var/www/rails3-bootstrap-devise-cancan-demo
root@remote $ mkdir -p ${deploy_to}
root@remote $ chown deploy:deploy ${deploy_to}
root@remote $ umask 0002
root@remote $ chmod g+s ${deploy_to}
root@remote $ mkdir ${deploy_to}/{releases,shared}
root@remote $ chown deploy ${deploy_to}/{releases,shared}
Note: The chmod g+s is a really handy, and little known Unix feature, it
means that at the operating system level, without having to pay much attention
to the permissions at runtime, all files and directories created inside the
${deploy_to} directory will inherit the group ownership, that means in this
case even though we are root, the files will be created being owned by root
with the group deploy, the umask 0002 ensures that the files created
during this session are created with the permissions owner read/write,
group: read/write, other: none. This means that we’ll be able to read these
files from Apache, or our web server by running the web server in the deploy
group namespace.
root@remote # stat -c "%A (%a) %n" ${deploy_to}/
drwx--S--- (2700)  /var/www/rails3-bootstrap-devise-cancan-demo

root@remote # stat -c "%A (%a) %n" ${deploy_to}/*
drwxrwsr-x (2775)  /var/www/rails3-bootstrap-devise-cancan-demo/releases
drwxrwsr-x (2775)  /var/www/rails3-bootstrap-devise-cancan-demo/shared
